The popular content management system WordPress offers its own plugin store integrated into your website. You can open it directly from the dashboard (the admin panel) of your WordPress website. In this article, I would like to show you how to quickly and easily add plugins / extensions to your WordPress website.
Preparations #
To access the plugin store, you must first log in to your WordPress website. To do this, open the following URL and enter your credentials there.
https://www.deine-domain.de/wp-login.phpOnce the link is opened, you should get a similar display as below.
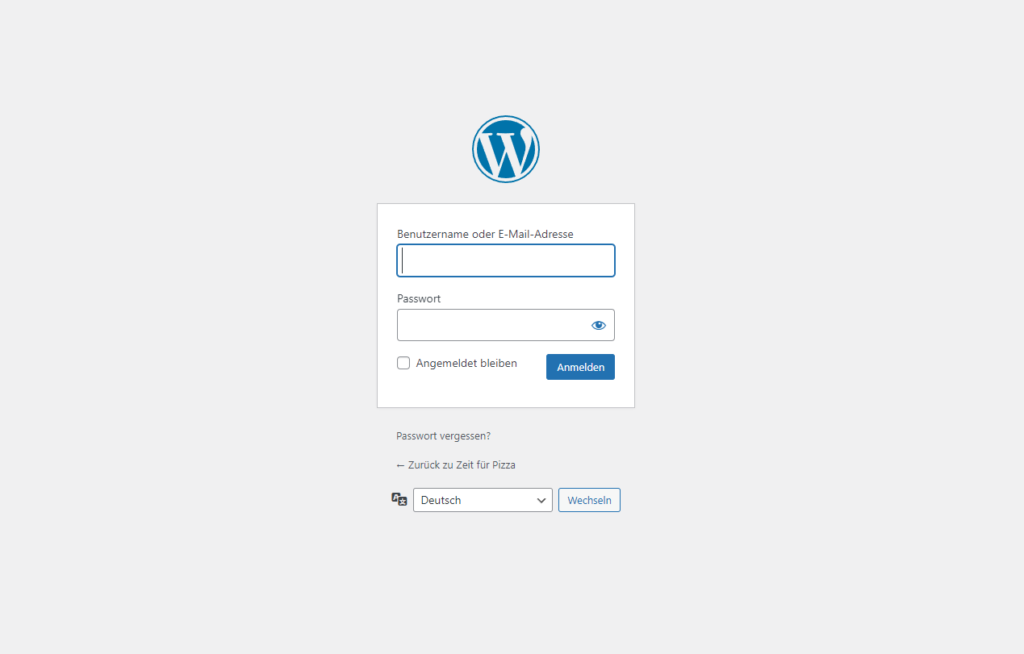
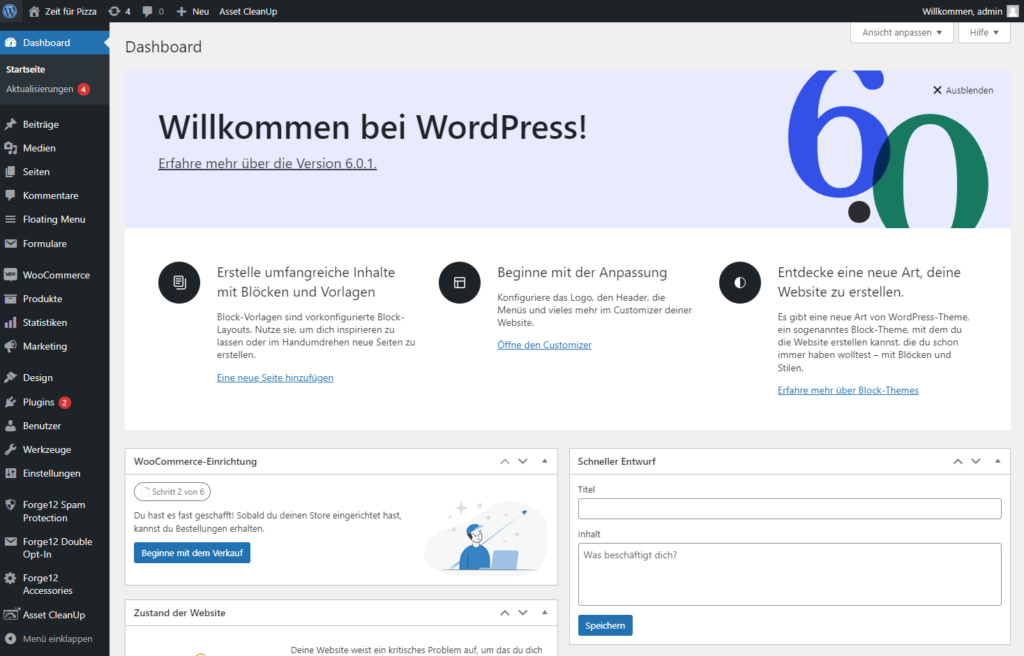
Here you have to enter your access data. Afterwards, you will be redirected to the dashboard of the WordPress website.
Open Plugin Store #
Using the navigation on the left side, you can reach all areas of the WordPress website.
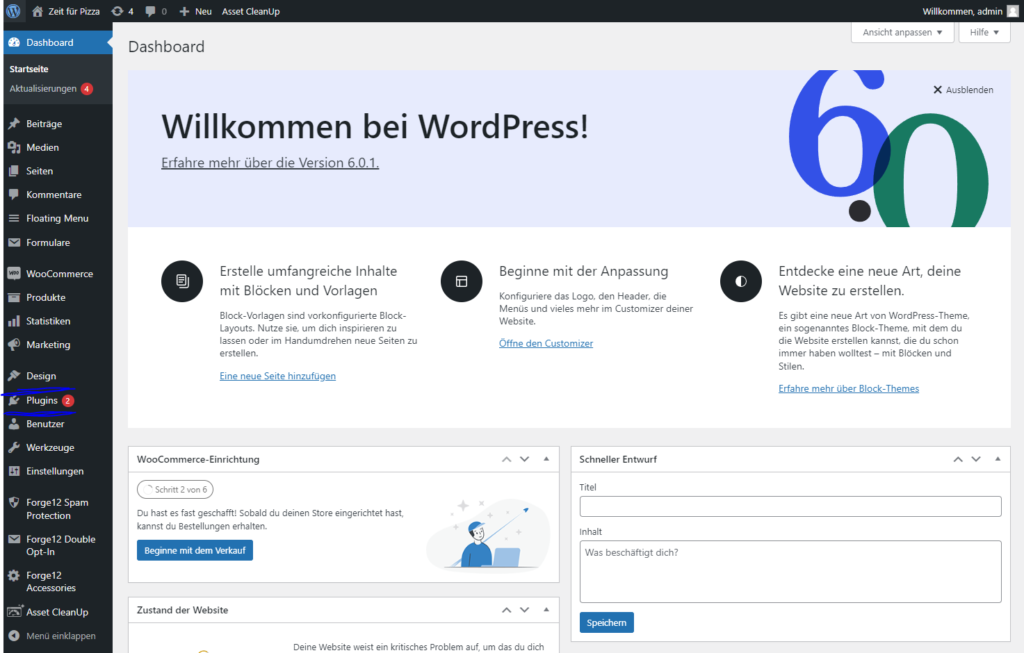
So also to the plugins and the plugin store integrated there. If you click on Plugins, you get to the overview of the installed extensions of the WordPress website.
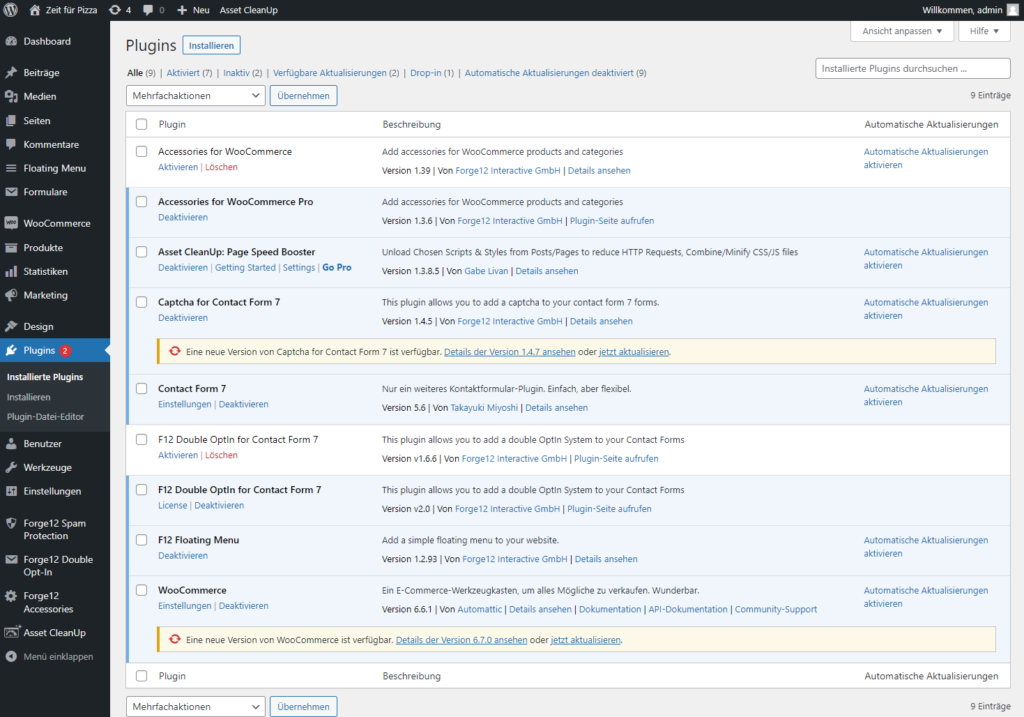
Here you can see all installed plugins that are available in the WordPress instance. In addition, you can deactivate individual plugins from here and also delete them completely.
Tip: For security reasons, all plugins that are not used should be removed from the system to prevent possible backdoors.
To install a plugin, use the navigation to switch to the “Install” submenu. Alternatively, you could also use the button labeled > Install < at the top of the screen.
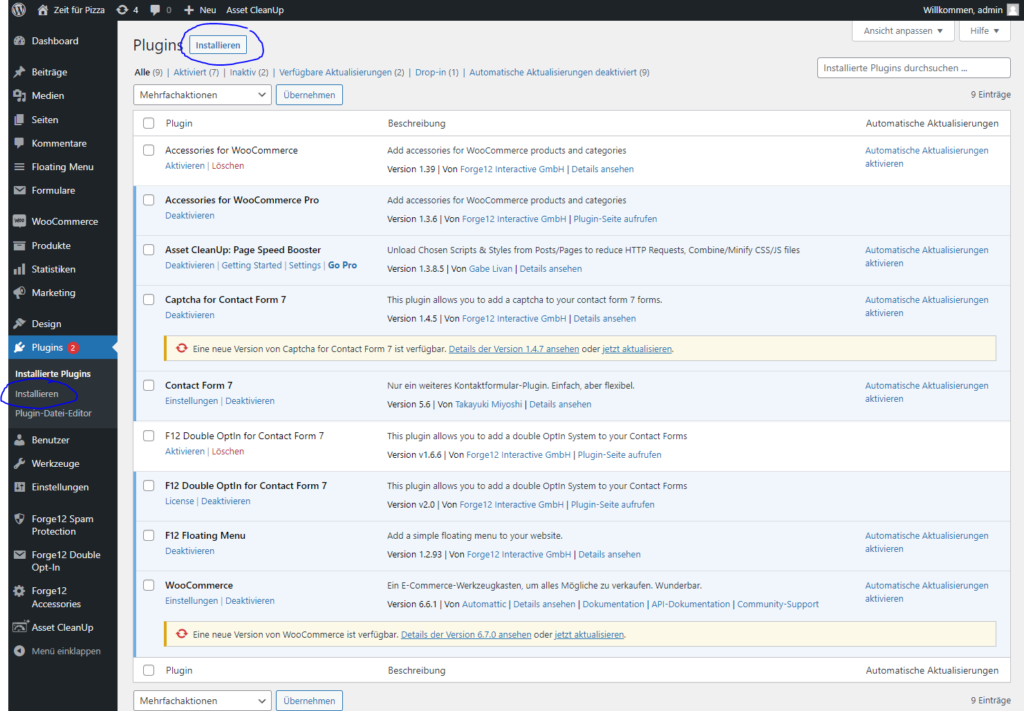
Now, there are two ways to install a plugin:
- Install plugins from the Plugin Store – these are free plugins or else plugins that are available in a light version.
- Upload and install plugins manually – these are mostly premium plugins purchased through external providers or developed in-house.
Install WordPress plugin from plugin store #
Under WordPress > Plugins > Install, you can view over 59,000 free WordPress plugins and install them for your own WordPress website. In addition, a keyword search and a filter function is available. So actually, everything to find the right plugin.
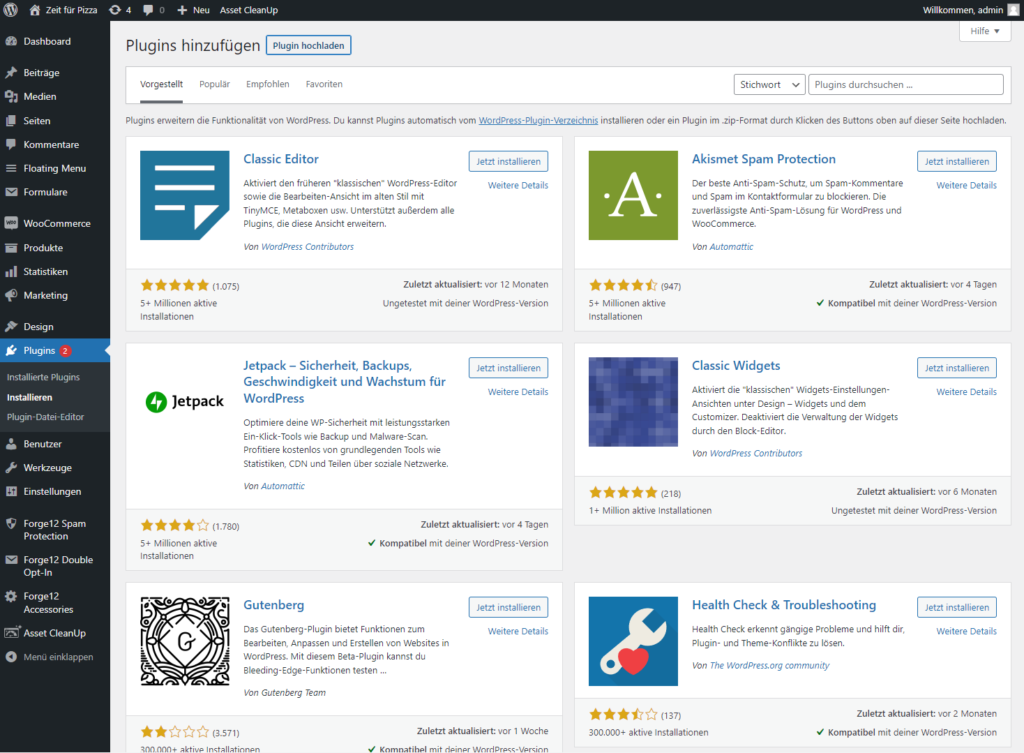
For example, if you want to install an SEO plugin that helps optimize your website, you can use the keyword search to display all plugins related to SEO. Therefore, enter the term > SEO < in the keyword search to get an overview of all SEO plugins.
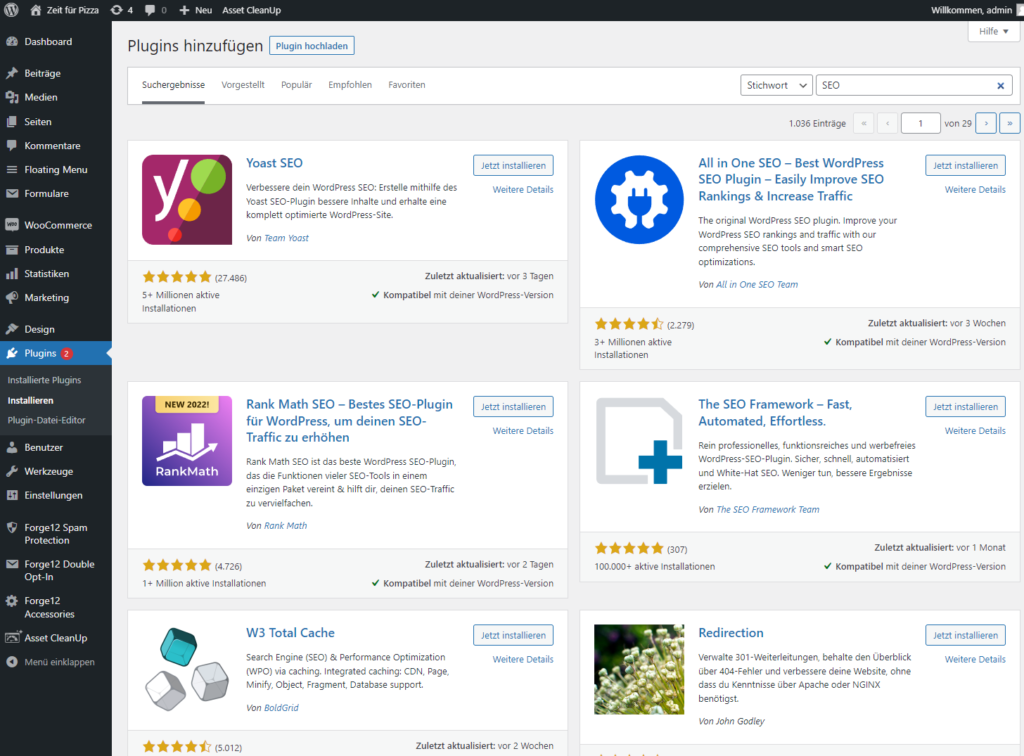
Next to each plugin, a button with the label > Install now < is displayed. Over it, you can add the individual plugins to the WordPress website. You simply select the desired plugin and click on the button.
If the installation went without problems, the text and the color of the button will change. Instead of > Install now < as before, it now says > Activate < and the color of the button turns blue.

To activate and use the plugin directly, click the > Activate < button. Alternatively, you could do this later via the plugin overview page (WordPress > Plugins).
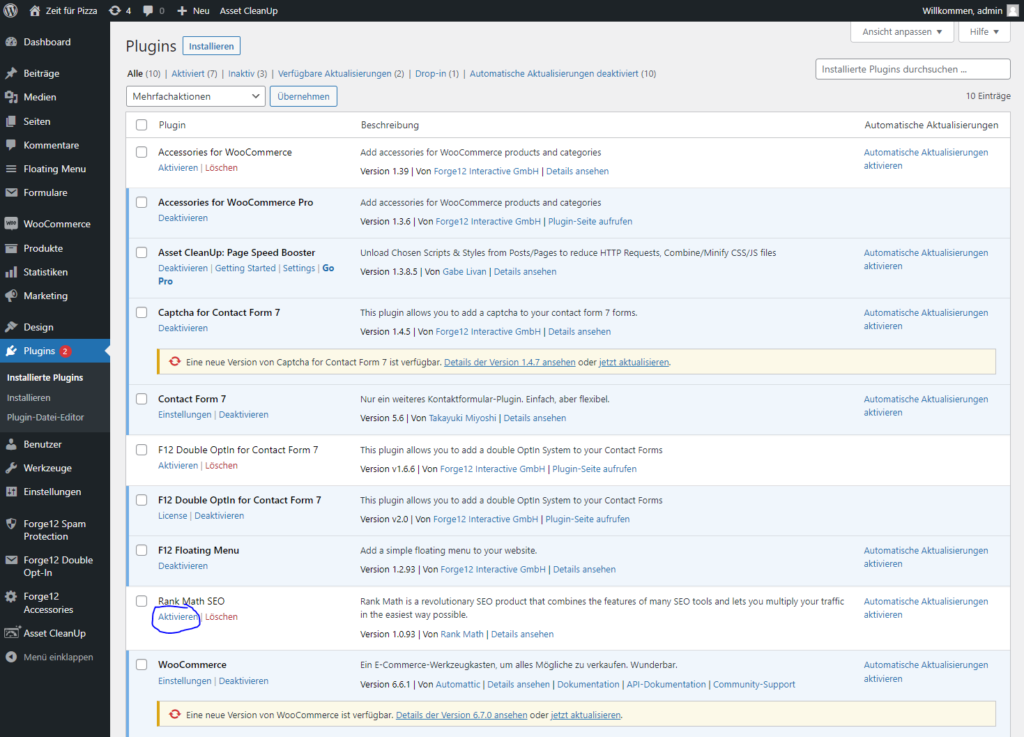
That’s it – the plugin is ready to be used on the website.
Upload/Install a WordPress Plugin Manually #
There are plugins that are not offered via the WordPress Store. These are often so-called premium plugins, i.e. extensions that must be purchased. Usually, these premium plugins are provided by external providers as a ZIP archive. These can then be installed via the upload form of WordPress.
To install a plugin manually, first go to WordPress > Plugins > Install and press the button > Upload plugin <. Now the upload form appears, with which the ZIP file can be uploaded to the server.
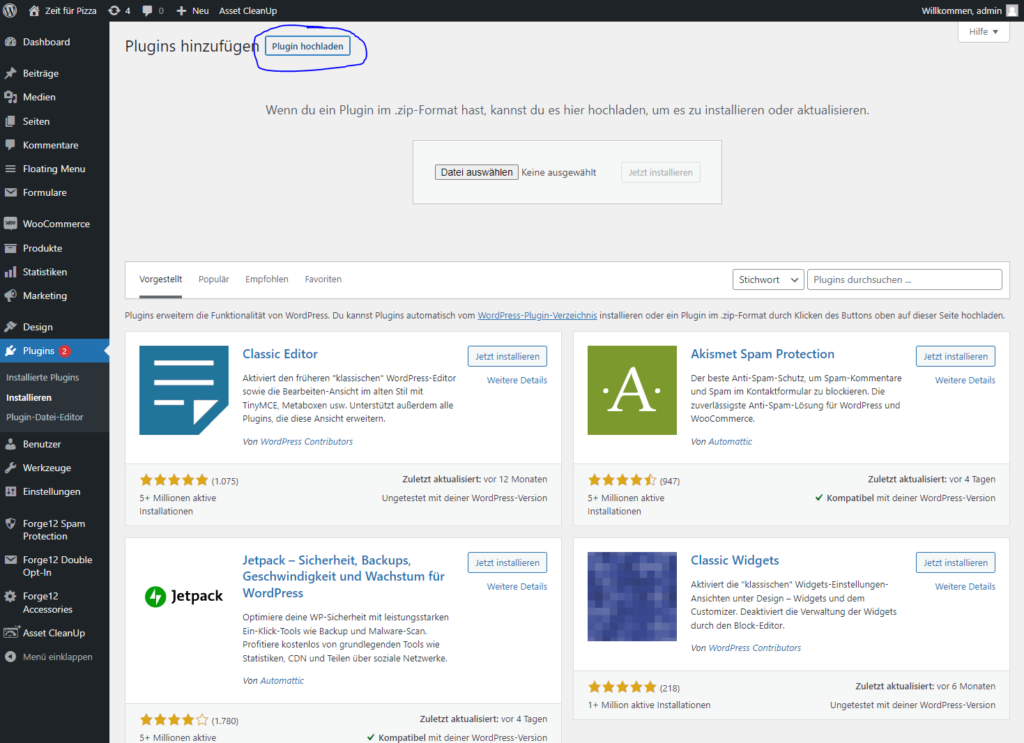
Via Select file, select the desired file and then confirm the upload with “Install now”. It must be a ZIP file. If it is not a valid plugin, WordPress will display an error message.

Then you activate the plugin via > Activate plugin < and can use this on your own page.

If everything worked, you will get a confirmation from WordPress that the plugin has been activated.
WordPress Plugin Upload via FTP/SFTP #
Besides the two WordPress solutions, there is of course also the possibility to provide plugins directly via FTP/SFTP.
For this, it is important to know where WordPress stores the plugin files. These can always be found starting from the main directory of the WordPress installation in the following directory:
/wp-content/pluginsWith a FTP client like FileZilla you connect to your webserver and change to the root directory of your WordPress installation.
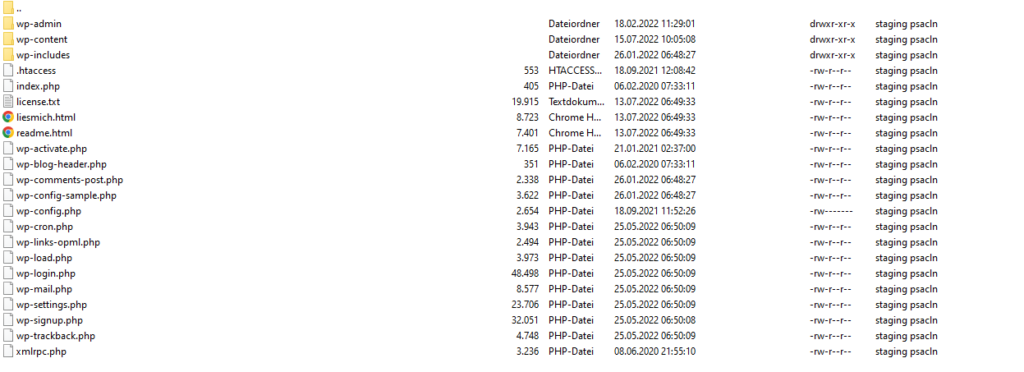
The main directory can be recognized by the file and folder structure. There should be the following folders wp-admin, wp-content, wp-includes and the file wp-config.php.
From here, you can now access the plugin directory via wp-content/plugins, where all existing plugins are already stored. The display may differ, as it depends on the plugins used.
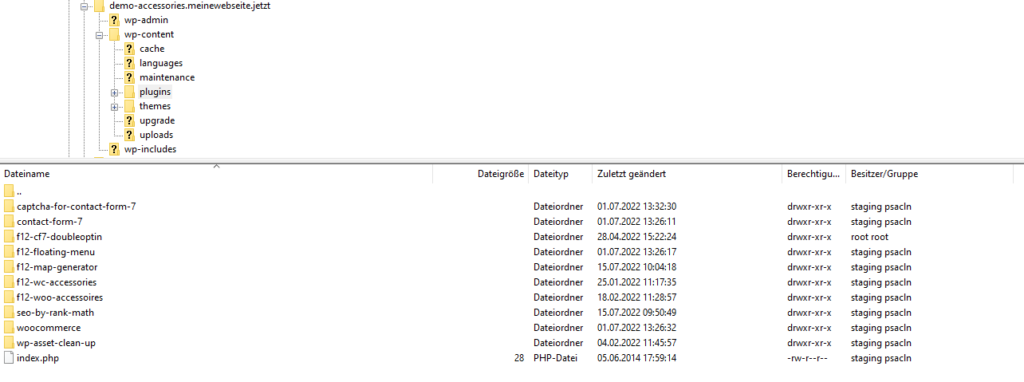
Each plugin is stored in its own directory. So in the example above, there are 10 plugins (including captcha-for-contact-form-7, contact-form-7, f12-cf7-doubleoptin, etc.).
Once you have uploaded the folder and its files to the server, the plugin will be displayed in the overview under WordPress > Plugins.
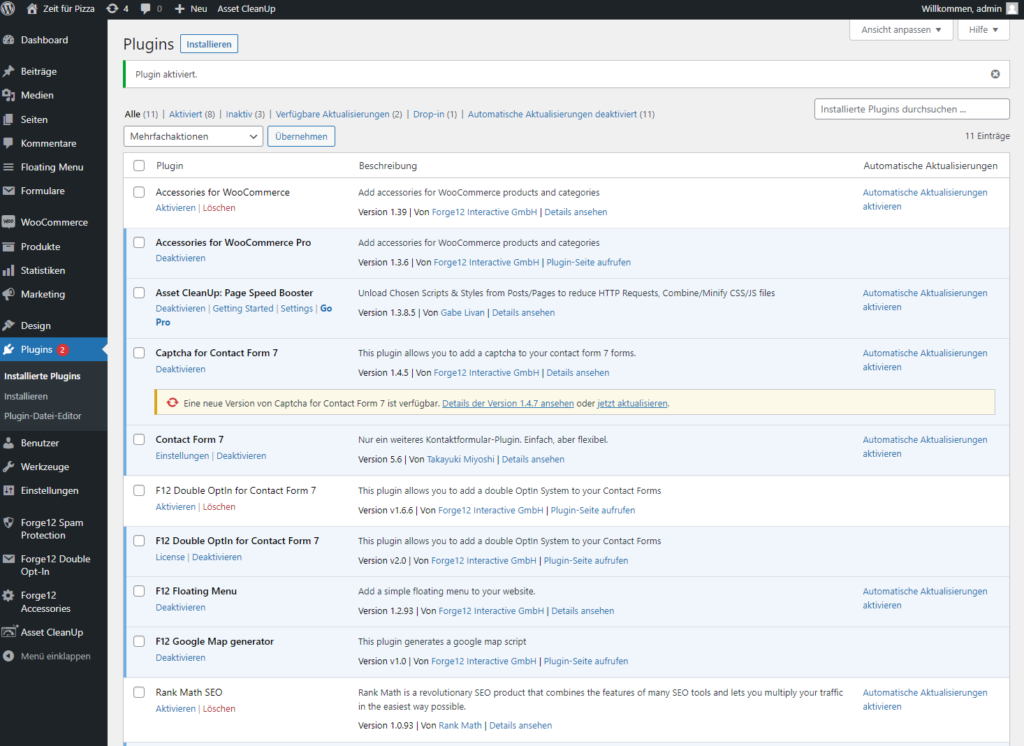
If the plugin does not appear here, either something was not done correctly during the upload or it is not a valid WordPress plugin.
Summary #
WordPress’ plugins can be easily extended thanks to the integrated plugin store. The keyword search makes it possible to find the right plugin, even with the abundance of plugins (more than 59,000).

Leave A Comment