WordPress BasicsJul 13, 2021
How to Change the Blog in a WordPress Multisite
As a WordPress agency, we also support companies, agencies, and schools that have created their website using WordPress Multisite.
A WordPress Multisite allows you to manage multiple websites within a single WordPress instance. You can easily switch between the individual websites via the WordPress dashboard.
Additionally, you gain access to a new area, the network administration. From here, you can make global settings and install and activate plugins and themes for all WordPress sites.
Furthermore, you can log in to all WordPress websites using Single Sign-On (SSO). This means you don’t have to remember new credentials for each site.
How do I change the default blog of my WordPress Multisite?
To make the change, you need to modify both the wp-config.php and the database. Therefore, you need access to FTP and the database, e.g., via PhpMyAdmin or HeidiSQL.
Step 1: Create a Backup
Before you start changing your data, you should definitely create a backup. This includes both your database and the wp-config.php. If you want to be extra safe, you can also download all the data of your WordPress Multisite. It’s best to save the data locally.
Step 2: Adjust the wp-config.php
You can find the wp-config.php in the root directory of your WordPress instance. It contains all the important settings, including the access data to your database.
Now we need to search for the following lines:
define('SITE_ID_CURRENT_SITE', 1);
define('BLOG_ID_CURRENT_SITE', 1);
The number (1) indicates which ID is currently set. If you have a different number, that’s fine. It simply means that your website has been switched once.
To find out the IDs you need to enter here, it’s best to open your database in parallel via PhpMyAdmin or with HeidiSQL.
Then switch to the database where your WordPress data is located and open the wp_blogs table.
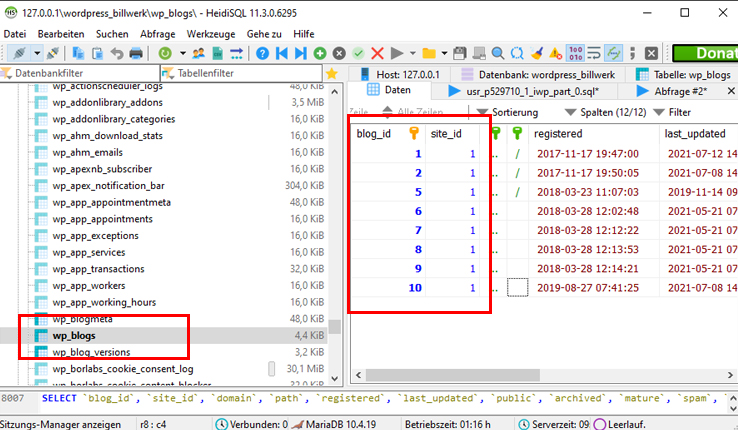
There you will now find the columns blog_id and site_id as well as the corresponding domain and path.
Now enter the desired blog_id and site_id in your wp_config.php and save the file on your server.
Step 3: Adjust the Database.
If you skipped step 2, you now need to open your WordPress database in PhpMyAdmin or HeidiSQL. Then switch to the wp_blogs table.
To set the new blog page as the homepage, you now need to adjust the 'domain' column. Here you need to enter the value from the original page.


That’s it for adjusting the domain.
Step 4: Adjust the wp_site Table
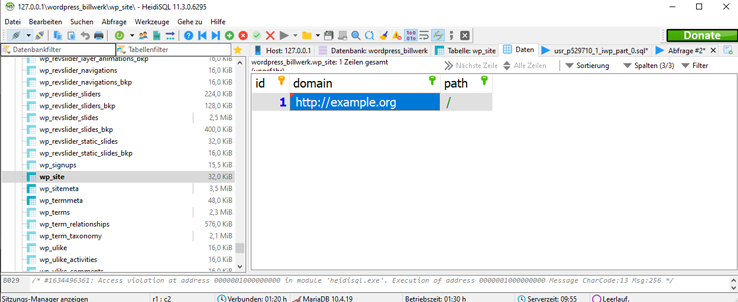
Now switch to the wp_site table. There you will find an entry with the fields id, domain, and path.
Here you need to ensure that the same entry is recorded in the Domain column as in the wp_blogs table. That is, the entry you modified.
Step 5: Adjust the Blog Posts and Pages
Finally, we need to adjust the links for the already created content. This will update all links and images.
You can use the following MySQL query for this:
UPDATE wp_posts SET post_content = REPLACE (post_content,'http://old-url','http://new-url');Just replace the entries 'http://old-url' and 'http://new-url' with the new domains.
That’s it!
Conclusion
The default blog of a WordPress Multisite can be changed in just 5 steps. I hope you enjoyed this little tutorial. If you don’t feel confident making the adjustments, we are happy to help you. As a WordPress agency, we specialize in this type of work.
Feel free to leave us a comment if you have any questions or remarks.