Development & EngineeringJul 05, 2021
How to Create a Child Theme in WordPress
Whether you have your website created by an agency, hire a freelancer, or take care of it yourself - you should definitely create a child theme before you start.
Why should I create a child theme for WordPress?
WordPress themes are regularly updated by their authors. During a theme update, all files in the folder are overwritten.
If you make changes yourself, which can be sensible from time to time, these will be overwritten during an update.
So should I just stop updating my theme? Sure, you could do that, but eventually, you run the risk that your theme will no longer be compatible with the latest WordPress versions and errors will occur.
The effort required to create a child theme is actually minimal. Moreover, you only have to do this work once. After that, everything runs automatically.
How can I create a child theme?
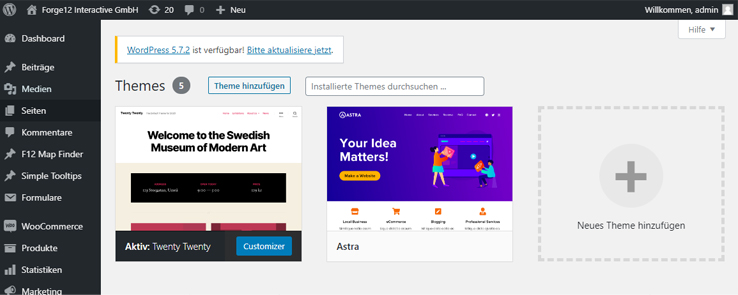
First, select and activate the theme of your choice for which you want to create your child theme. (Appearance > Themes)
Create a folder for the child theme
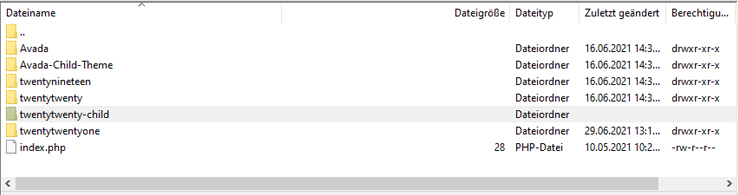
Once you have installed your theme, connect to your server using your preferred FTP client. Then navigate to the folder wp-content > themes.
Now create a new folder. What you name it is up to you. Usually, you take the title of the theme and add the suffix "-child".
From "twentytwenty" it becomes "twentytwenty-child".
Create a style.css file
Once you have created the folder, create a file named style.css. Insert the following template and then replace the text:
/*
    Theme Name:   Twenty Twenty Child
    Description:  My Child Theme
    Author:       My Name
    URI:          My Website URL
    Template:     twentytwenty
    Version:      1.0
    Text Domain:  twenty-twenty-child
*/
Create functions.php
Now we need to create the functions.php file in the child theme folder. Insert the following code as a template.
function child_theme_styles()
{
    wp_enqueue_style('parent-style', get_template_directory_uri() . '/style.css');
    wp_enqueue_style('child-theme-css', get_stylesheet_directory_uri() . '/style.css', array('parent-style'));
}

add_action('wp_enqueue_scripts', 'child_theme_styles');
The code specifies that first the stylesheet from the original theme is loaded. Then the stylesheet from the child theme is loaded.
Create a preview image
You can now create a preview image that will be displayed under Appearance > Themes. For this, simply create an image named "screenshot.png" and place it in the child theme folder. Alternatively, you can also use the image from the original theme.
Activate the child theme
Now you just need to activate the child theme. For this, go back to your WordPress dashboard under Appearance > Themes and activate it.
Your child theme should now be activated.
Further Customizations
If you installed the child theme later, you need to take over a few customization settings. For this, you can use the Customizer Export/Import plugin.
Conclusion
That's it. As you can see, the effort required to create a child theme was relatively simple and quick to accomplish. Furthermore, it saves a lot of work when it comes to an update.
You should also secure your WordPress installation. Read here how to increase the security of your WordPress website.
Alternatively, you can also take advantage of our WordPress maintenance packages and we will take care of the security of your site.