WordPress Errors & MaintenanceMar 10, 2022
How to Increase the WordPress Memory Limit
To increase the WordPress memory limit on your website, you just need to adjust the configuration file wp-config.php. To do this, add the following line of code:
define('WP_MEMORY_LIMIT', '256M');The 256M stands for 256 MB. You can of course enter a different number, such as 64M, 128M, or 512M.
The maximum amount of memory you can set depends on your hosting provider. For web hosting, the available memory typically ranges from 64 to 512 MB. For a VPS, managed server, or dedicated server, the value is usually much higher or can be set individually.
How to Increase Memory for the WP Dashboard (Backend) in WordPress
In addition to the default setting, you can also increase the memory specifically for the admin settings of your WordPress website. For this, there is the following line of code that you can place in wp-config.php:
define('WP_MAX_MEMORY_LIMIT', '256M')Here again, you can adjust the memory as needed, provided your host supports it. This setting only affects the backend of WordPress.
How to Find Out How Much Memory Your WordPress Website Has Available
To find out how much memory you have available, you can either check your hosting contract or view the PHP info file.
To display the PHP info file, create a new PHP file in the root directory of your WordPress installation, for example, you can name it info.php. Insert the following content into the file:
<?php
phpinfo();
?>
Then save your file and access it via your browser. If you placed the file in the root directory of your WordPress installation, the URL will be as follows: https://[your-domain]/info.php.
In the browser, you will now see all PHP settings. This includes the "memory_limit". It’s best to use the search function CTRL+F to look for the term. You will then see how much memory is available to you.
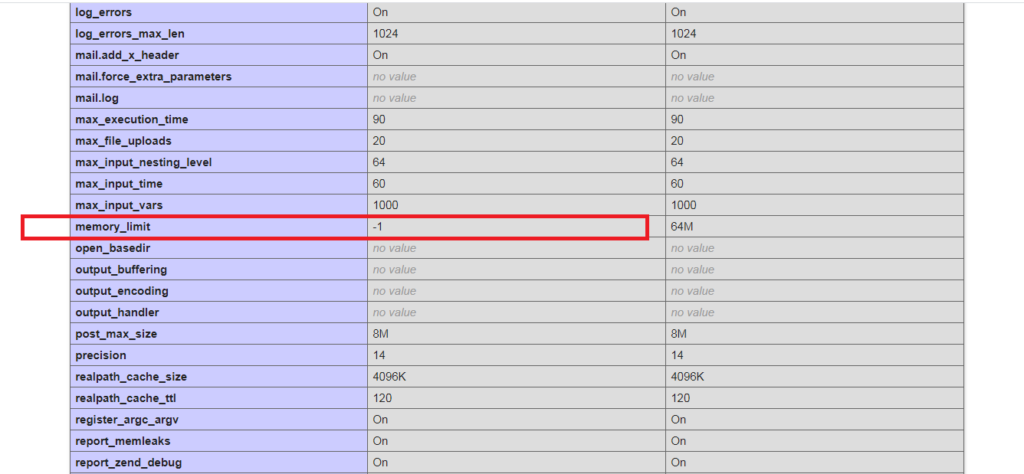
You can now note the value and then return to the wp-config.php file to adjust the value according to the PHP info.
When Should You Increase the Memory Limit?
This depends entirely on the situation. There are various warning signs that indicate insufficient memory is available.
Longer Loading Times in WordPress
As soon as you notice that your site takes significantly longer to load in the backend/frontend, you should increase the value. If your website loads quickly again after the change, you did everything right. Otherwise, you can also revert the value and look for other errors.
Fatal Error: Allowed Memory Size of XXX Exhausted (tried to allocate XX bytes)
A clear sign that your memory is insufficient is this error message. The numbers can vary depending on how much additional memory is needed.
PHP: Fatal Error: Allowed Memory Size of 8388608 Bytes Exhausted (tried to allocate 54 bytes)You can find such error messages either in the debug.log of your WordPress website or in the error.log of your server. If you have enabled error message output, it will also be displayed when accessing the page.
At the latest, you should take action now and ensure more memory. If the error persists, you should contact your host to inquire whether you have sufficient memory available.
White Screen of Death (WSoD)
Not as obvious, but still a possible warning signal for insufficient memory is the so-called White Screen of Death in WordPress.
The tricky part is that at first glance there are no indications that the memory is overflowing. You have to sift through the log files (debug.log, error.log) to get more specific error messages.
To save time directly, you can simply try to increase the memory and then trigger the problem again. If the WSoD disappears, you know that your memory has reached its limit.